Sterilization In Dental Office
Effective and efficient infection control in dental clinics is essential for the safety of patients and to ensure that productivity does not suffer.
Infection control programs all include the cleaning and sterilization of reusable dental instruments and devices.
Today’s busy dental practices face a serious challenge, to maintain or increase productivity while ensuring that patient safety remains a top priority.
Most dental offices have a designated area for instrument reprocessing that is separate from the dental treatment room.
This is ideal as cleaning, sterilizing and storing instruments in the same room where the delivery of patient care is provided increases the risk of cross-contamination.
The removal and disposal of single-use sharps such as needles, blades, orthodontic wires, glass, and saliva ejector are done at the point of use, typically in the dental treatment room.
The person handling the instruments through removal, cleaning, packaging and sterilization needs to use heavy-duty gloves to help prevent injury with sharp contaminated instruments.
The overall process involves following steps-
1. Cleaning instruments prior to sterilization
The first and most important step in instrument reprocessing is cleaning, as a dirty instrument cannot be effectively sterilized.
Instruments should be thoroughly cleaned to remove blood or other debris prior to sterilization.
Blood or debris on the instruments can prevent steam or chemical vapor from contacting the instrument surfaces to achieve sterilization.
This is because the dirt shields bacteria and viruses from the sterilizing agent. As a result, bacteria and viruses may very well survive the sterilization process and can cross infect the next patient.
The most common method of cleaning instruments is manual cleaning (cleaning by hand). Manual cleaning has the advantage of flexibility and any type of instrument can be cleaned manually.
First step for manual cleaning is to first soak the instrument in a tepid or lukewarm water or detergent bath for at least 10 minutes.This step softens and loosens much of the dirt that may have dried on the instrument.
The next step is to completely brush the instrument with a brush while it is in the soak bath.
Brushing should be done under the surface of the water to minimize aerosols and with brush strokes away from the body to avoid exposure to spray from the brush.
The instrument should then be rinsed with clean water and, if difficult-to-remove debris or dirt remains, another enzyme soak followed by brushing and rinsing should be done.
Ultrasonic Cleaning
Although manual cleaning removes most or all of the visible debris or dirt from instruments, it may not remove small or microscopic particles that are protected by the texture of a surface or design features like hinges.
Ultrasonic cleaners create microscopic bubbles using sound waves in the solution that collapse when they contact the instrument releasing energy. These bubbles act on debris to remove it from the instruments. This process is called cavitation.
The specialized detergent in the ultrasonic bath suspends the dirt particles and keeps them from attaching back to the instruments.
Following ultrasonic cleaning, the instruments are rinsed with clean water and dried.
2. Rinsing and drying
After completing the cleaning of the instruments, they must be carefully rinsed with filtered water or instrument washers.
The instruments must be opened and dried with compressed air pistols with no oil or humidity, or they can be dried with paper towels and clean lint-free cloth.
3. Inspection
This step verifies the efficiency of the cleaning process. Each and every instrument should be inspected for function and cleanliness after cleaning.
Any damaged instrument should be replaced and any instrument with visible residual dirt or debris should be returned for further cleaning.
Store instruments away from possible cross-contamination and moisture- Sterile instruments first must be left in the sterilizer until the packaging to prevent wicking of air contaminants into the packages.
4. Packaging of all Instruments
This recommendation is the standard of care for patient safety.
Packaging should be done in a clean area .Sterile packaging, i.e., pouches, wrap, or rigid containers serve to maintain the sterility of processed instruments and allow for aseptic opening at point of use.
Packaging instruments is critical in maintaining the sterility of instruments until they are used, and the instruments are placed directly into a sterilization pouch.
STERILIZATION
Sterilization is the process to destroy or eliminate all microbial life forms through physical or chemical procedures.
The reputed dental clinics in India make it a point to follow proper sterilization procedures to ensure safety of their patients.
Steam sterilization is the most commonly used process for sterilizing instruments, trays, and cassettes as it is considered safe, fast, and the most cost-effective for health care facilities.
A steam sterilizer runs series of cycle.
Other commercially available sterilization processes include: chemical vapor, dry heat, ethylene oxide, vaporized hydrogen peroxide, and ozone.
For patient safety, the process must be compatible as to not cause damage and must be efficacious to ensure sterility.
Parameters such as time, pressure and temperature vary according to the type of sterilizer, materials being sterilized and individual models within sterilizer brands.
a) Steam autoclave
Steam autoclaves are the most commonly used type of heat sterilizer in dental practices.
The combination of pressurization of the chamber, steam and a high temperature for a prolonged period has the ability to kill virtually all microorganisms.
It is important to use cycle times and temperatures described in the owner’s manual and never to interrupt the sterilization cycle to remove or add items, or for any other reason.
Interruption of the cycle will result in instruments that are not sterile and therefore not safe for use on patients.
After the sterilization cycle, the sterilizer must depressurize and the packs remain in the sterilizer for drying.
The drying phase may take anywhere from 20-45 minutes. The unit must only be opened after completion of the drying cycle. Upon removal from the sterilizer, sterile packs must be stored in a clean, dry area.
Packs that become wet, torn, contaminated, or otherwise compromised require resterilization.
b) Dry-heat sterilization
Dry-heat sterilization employs high temperatures for extended periods to achieve sterilization of instruments.
The method of heat circulation in dry-heat sterilizers is usually convection, which helps to ensure that the heat circulates throughout the sterilization chamber during the process.
Mechanical convection is more effective; the sterilizer contains a fan or blower that continually circulates the heated air to maintain a uniform temperature throughout the chamber. Most commercially available dry-heat sterilizers on the market today are of this type.
Specialized packaging material is available for dry-heat sterilizers.
Most handpieces will not tolerate the higher temperatures of a dry-heat sterilizer and are susceptible to damage at higher temperatures.
The manufacturer’s instructions should be checked for compatibility of instruments and devices.
c) Unsaturated chemical vapor sterilization
Unsaturated chemical vapor sterilization relies upon the use of a proprietary chemical that contains formaldehyde, alcohol and other inert ingredients, instead of water, to produce a vapor to promote the sterilization.
Use of this proprietary chemical also results in the vapor having less humidity and therefore being less corrosive to sensitive instruments than if water were used.
Care must be taken by the dental healthcare professional to ensure that all instruments are cleaned prior to sterilization.
Failure of sterilization can occur due to mechanical malfunction of the sterilizer or due to operator error.
All the efforts that go into the preparation of instruments are futile if the sterilization process itself is not successful.
Assurance of sterility of instruments and devices can be obtained through the use of one of several tests, and these tests must be performed regularly to ensure that the sterilizer is sterilizing all instruments and devices and that these are safe for use on patients.
Dentists in Delhi and India are taking appropriate measures to ensure proper asepsis and sterilization in their clinics.
Posted by- Dr Shriya
Testimonials
TESTIMONIALS
Carol Pocock

"From the moment i got here i knew i had made the right decision."
Carol Pocock
Location:- Canada

THOMAS BAINS

"The hygiene is good, the care up to European standards if not better. Strong on explaining..."
THOMAS BAINS
Location:- European Commission
Sinead

"A new beautiful smile made by a beautiful lady who truly cares for her patients..."
Sinead
Location:- England
Alla Lu

"I have the smile of my dream….This clinic is very professional and they use only best materials..."
Alla Lu
Location:- Russia
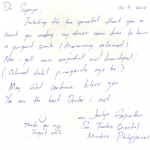
Jacyln Gopinathan

"Thank you so much for making my dream come true to have a perfect smile..."
Jacyln Gopinathan
Location:- Mindro Philippines
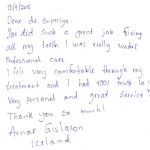
Arnar Gislason

"I felt very comfortable through my treatment and i had 100% trust in you..."
Arnar Gislason
Location:- Iceland
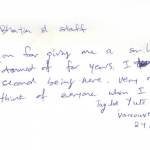
Yuto Harrison
"Thank you for giving me a smile that i’ve dreamed of for years..."
Yuto Harrison
Location:- Canada
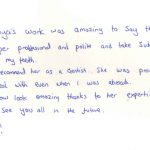
Todd

"Dr. Suprriya’s work was amazing…. She is super professional and polite..."
Todd
Location:- Australia
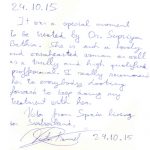
Victor Vique

"Dr. Suprriya is such a lovely and warm hearted woman as well as a truly and high qualified professional..."
Victor Vique
Location:- Switzerland
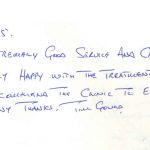
Tim Gound
"Extremely good service and care..."
Tim Gound
Location:- U. K.

RICHARD SALDANHA

"Me and my family were very reluctant to undergo my dental treatment in India, but..."
RICHARD SALDANHA
Location:- Peru, South America
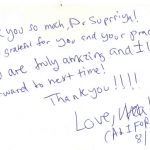
Karina

"Thank you so much, Dr. Suprriya! I am so grateful for you and your practice."
Karina
Location:- California
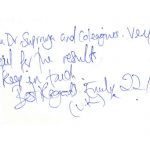
Emily
"Very attentive and grateful for the results. I will keep in Touch"
Emily
Location:- U. K.
Jennifer
"You saved my teeth. Lovely clinic and very professional staff..."
Jennifer
Location:- U. K.

Hugh

"My teeth are 7-8 shades whiter, thanks to you and your team..."
Hugh
Location:- Ireland

Rani Saund
"Thank you very much dr. suprriya for wonderful treatment for implants and bridge and giving me my smile back."
Rani Saund
Location:- England
Elsa

"Felt in good hands during the whole treatment..."
Elsa
Location:- Germany

Daniel
"Visited many dentist around the world and smile delhi definitely gives you a great smile..."
Daniel
Location:- Australia
Hilla Waheed

"Over all experience was wonderful…"
Hilla Waheed
Location:- Afghanistan

Kevin Kahan
"My emergency treatment was incredible kind and 1st class....."
Kevin Kahan
Location:- Ireland
Jeff

"Didn’t hurt, looked good, felt good, clearly explained and professionally done..."
Jeff
Location:- New zealand

Andreas

"You treated me gentle as a child!..."
Andreas
Location:- Norway

USAMA

"You are probably one of the best dentist I have ever been to in the last 50 years..."
Usama
Location:- Saudi Arabia
Belle

"I have the Hollywood teeth I always wanted…"
Belle
Location:- Canada
David Seeley
"The root canal was almost pain free....."
David Seeley
Location:- UK

Lesley Marsdin
"Thank You very much for giving me my smile back and my holiday!....."
Lesley Marsdin
Location:- UK
Roberta
"Every thing was great and pain less !....."
Roberta
Location:- UK
Mr. & Mrs. Piper
"It has been very professional. Very clean, very good......"
Mr. & Mrs. Piper
Location:-Winchester, England
Laurewce Moon
"I even laughed when they screwed the posts in ! very professional even enjoyed it a bit"
Laurewce Moon
Location:- UK
Tenzin

"The result was much more than I expected in zoom whitening....."
Tenzin
Location:- Bhutan
Angie

"Root canal was pain free and i felt really comfortable during the procedure....."
Angie
Location:- Paraguay
Ken Bakshi
"Amazingly professional and courteous experience......"
Ken Bakshi
Location:- USA
DANNY

"I would like to have sometimes so good dentist in Europe like Dr Suprriya..."
DANNY
Location:- Austria

ALLISON WEST
"I would highly recommend Suprriya to anyone seeking good oral health care..."
ALLISON WEST
Location:- Australia
MARIO

"Dr Suprriya, I just want to thank you for the very well done..."
MARIO
Location:- Columbia (Diplomat in India)
JEFF MC CLEAN

"After travelling all through India and visiting 7 different clinics, this..."
JEFF MC CLEAN
Location:- New Zealand

PEDRO MORAES

"The standard of the clinic is like a first country’s clinic..."